Monitoring and Logging: Tracking Every Command in Your Virtual Machine Using AWS CloudWatch

I document my learnings here.
In this blog, we are going to monitor every command in the AWS EC2 instance on AWS CloudWatch. We are going to use a Linux package called Snoopy. Snoopy is a logger that will register every command entered in the EC2 instance in a snoopy.log file. Then we are going to use AWS CloudWatch Agent that will send the data of the snoopy.log file to the AWS CloudWatch log group. After doing this you will be able to see every command that has been entered into the EC2 instance in AWS Cloudwatch.

Excited? Let's Go
1. Create a role for Ec2 Instance
Your EC2 instance will need permissions to send logs to CloudWatch which will be provided by a role. See AWS documentation, under the heading Create IAM roles to use with the CloudWatch agent on Amazon EC2 instances to create role. Click here to see that documentation.
2. Create a log group in CloudWatch
To create a log group go to the CloudWatch service in your AWS Console.
There will be a CloudWatch tab on the left side of your screen, in this tab under the Logs section click on Log groups
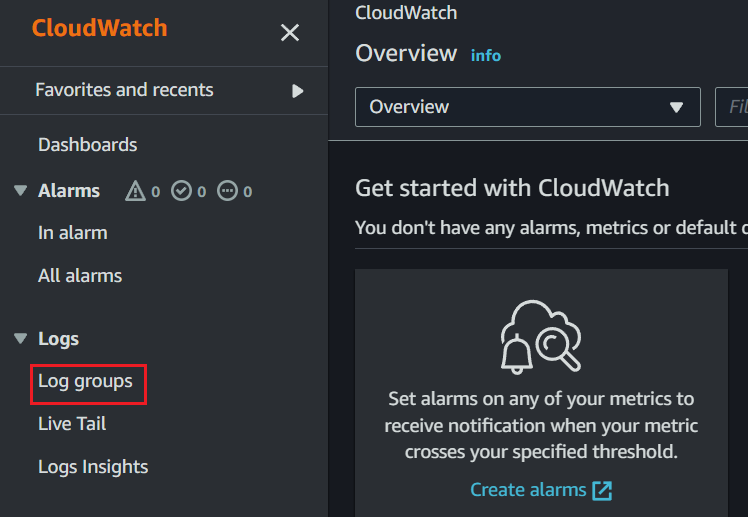
In the Log groups page, click on Create log group

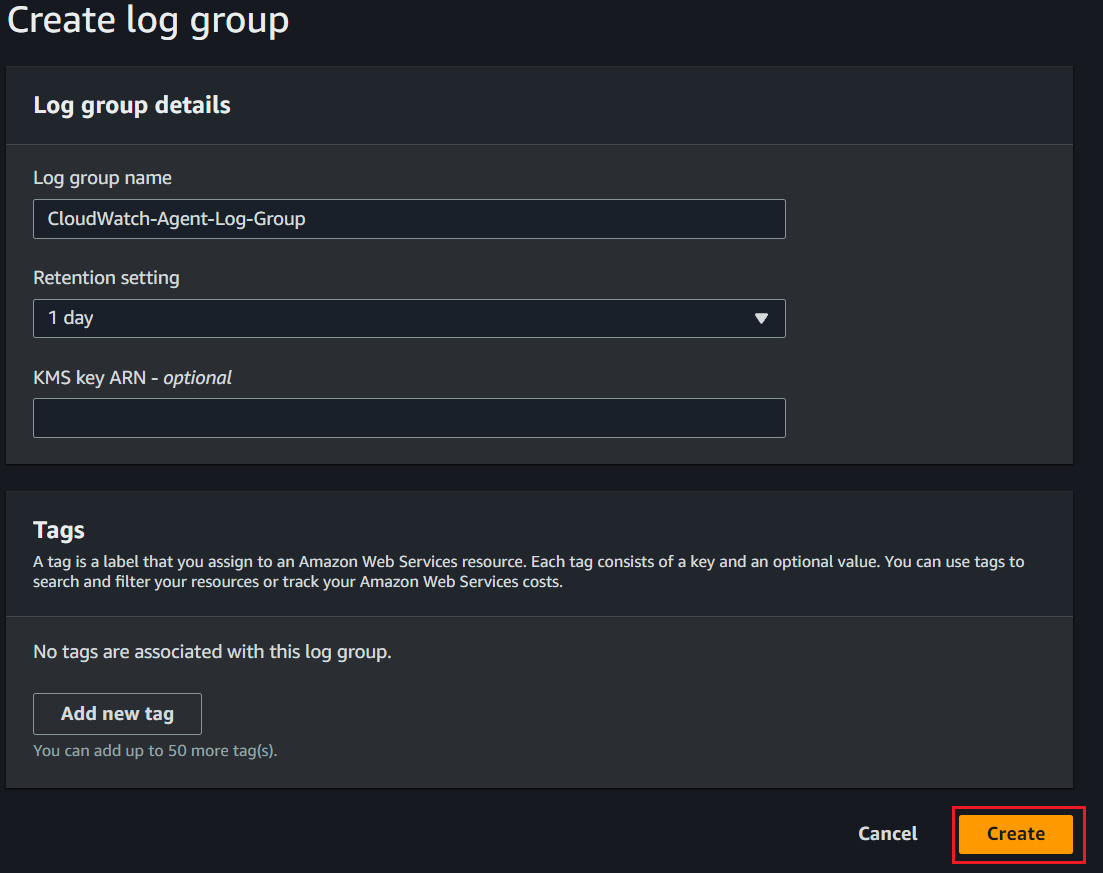
- In the Create log group page, set the log group name as "CloudWatch-Agent-Log-Group" and the retention period to 1 day. After this click on create.
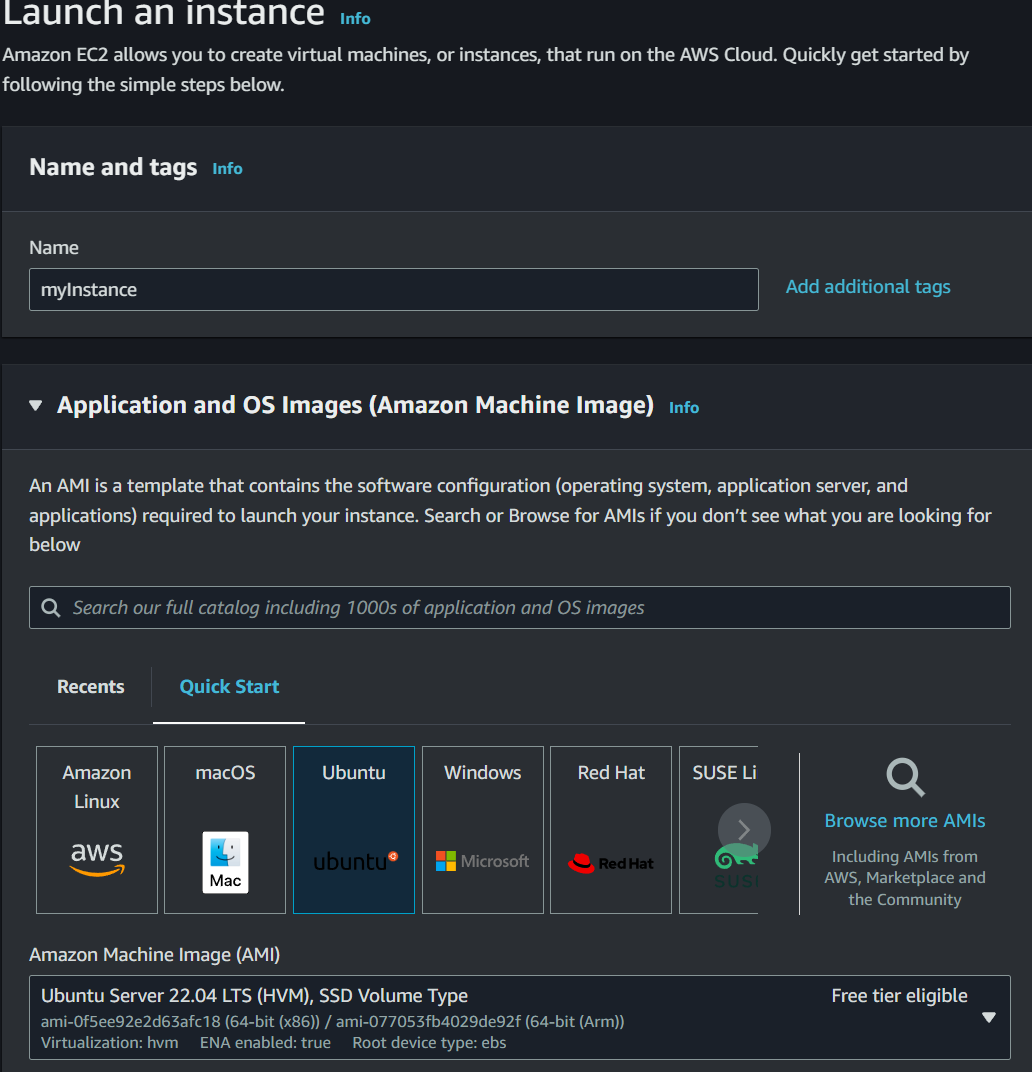
3. Create EC2 instance
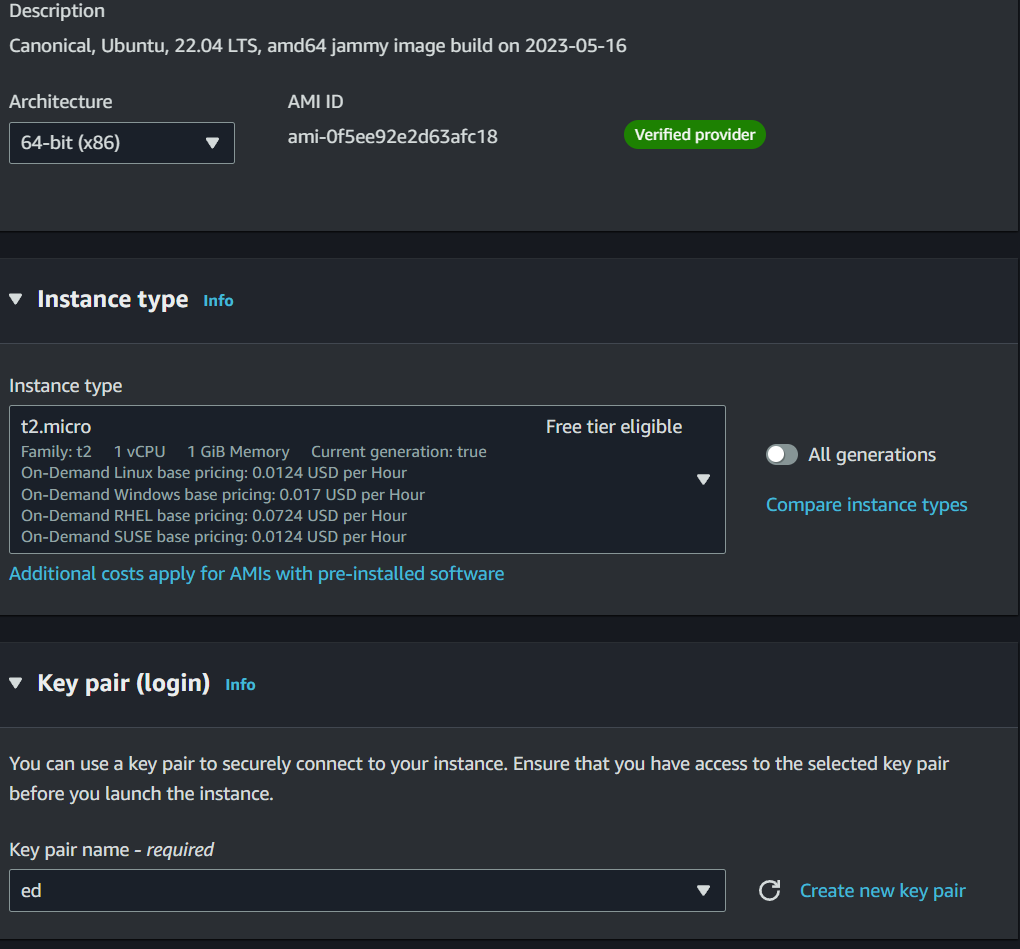
Create an EC2 instance with an Ubuntu image.
Select the t2.micro instance to be in the free tier or any other instance with a 64-bit architecture.
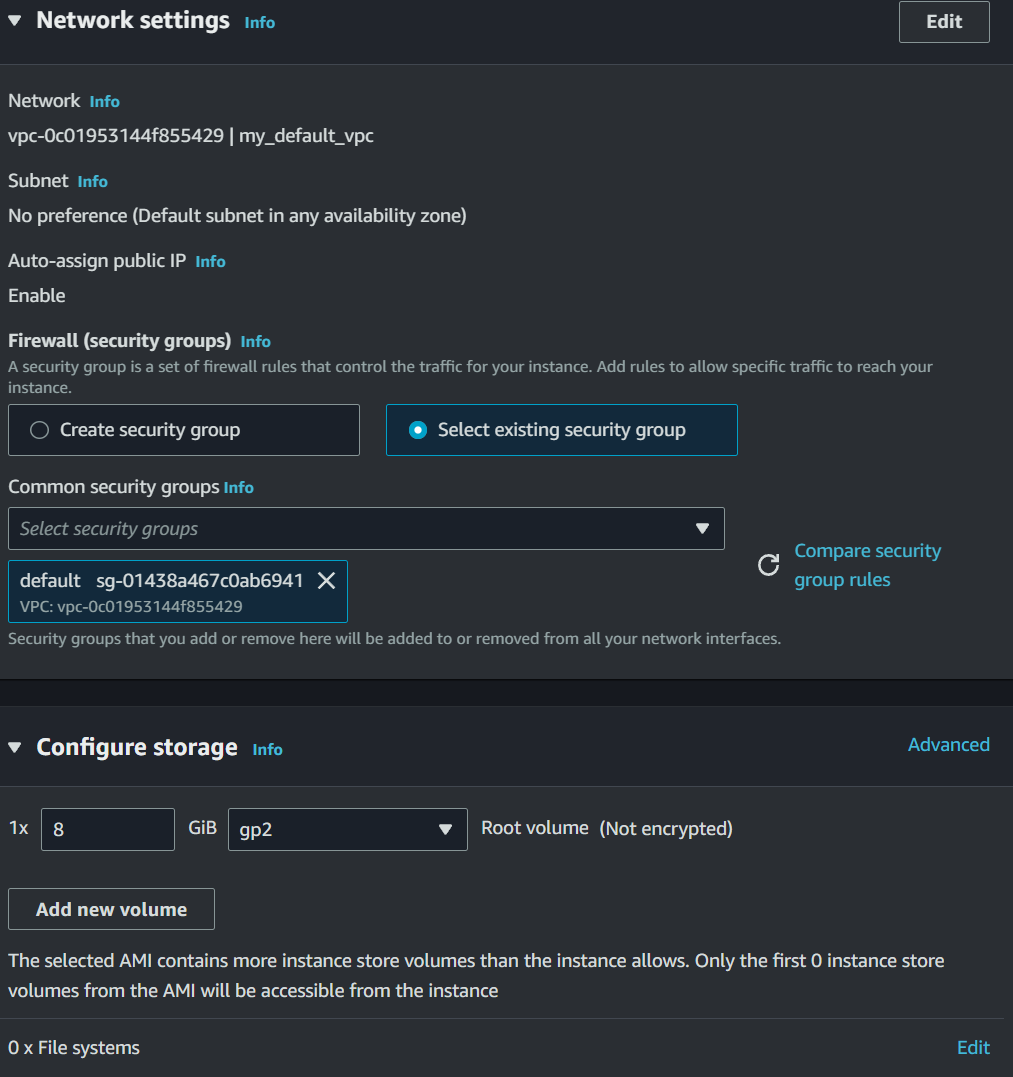
Make sure that the security group you are setting has the inbound rules which allow AWS EC2 agent to send logs to CloudWatch freely. Below is the inbound rule I have in my security group which is being used by the EC2 instance and a rule that lets you ssh into your instance. Here is the inbound rule that I am using-

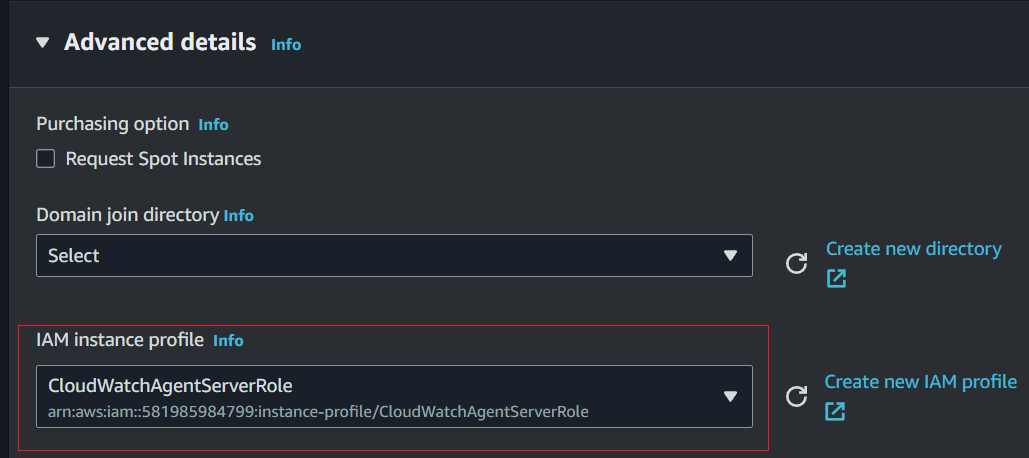
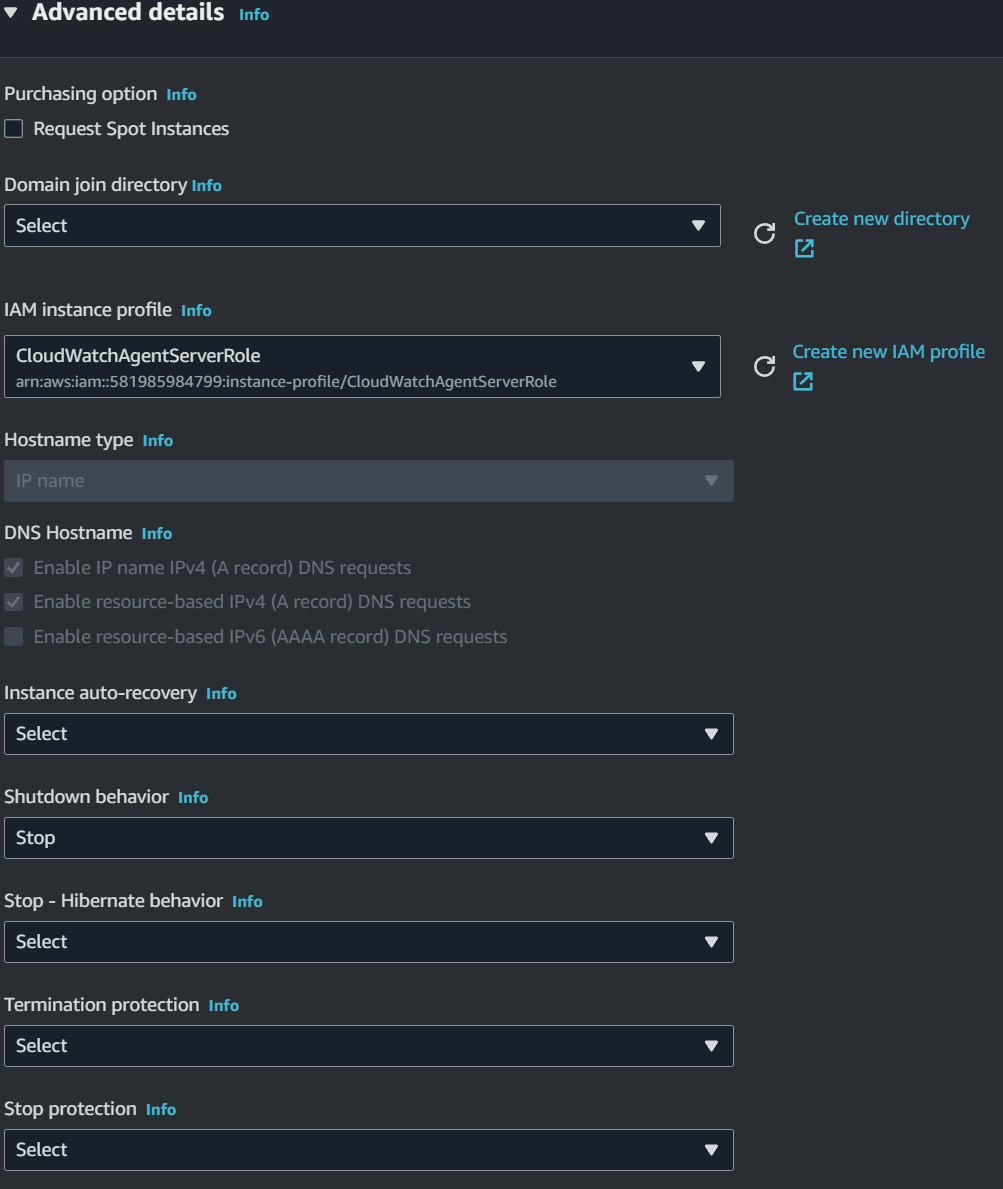
Attach the role we created earlier to the EC2 instance. You can do this in IAM instance profile option under the Advance details section on the Launch instance page.
- You can use Other configurations like vpc, availability zones, storage, etc. as you want them to be. I would recommend using default settings. For your reference, I am pasting my Launch instance page screenshots.
4. Set permissions for log files and ensure executed command gets stored in a dedicated log file
SSH in your EC2 instance
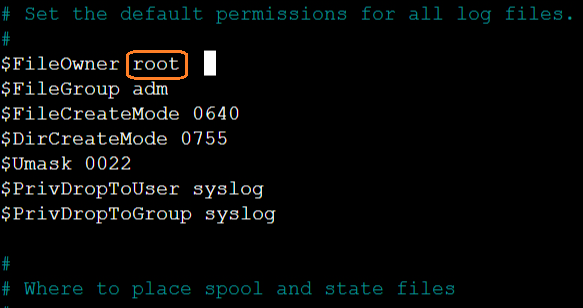
First, we need to change the FileOwner of log files from syslog to root, run-
sudo nano /etc/rsyslog.confand look out for the commented line "Set the default permissions for all log files." Under it, remove syslog in front of FileOwner and writerootthere.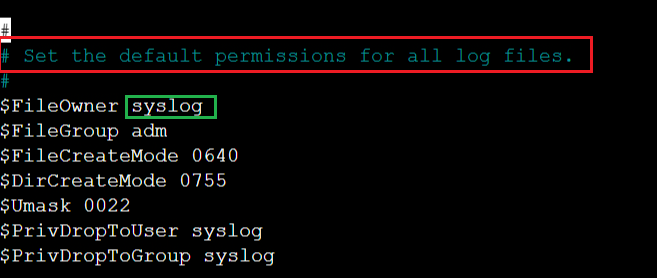
press
ctrl+sand thenctrl+xNow, if you run
cat /etc/rsyslog.conf | grep "^\$File\|\$Umask"you should see the screen exactly as the screenshot provided below.
Ensure that executed commands are stored in a dedicated log file using clearly defined permissions, run-
cat << EOF | sudo tee /etc/rsyslog.d/01-snoopy.confand then paste the code below and hit enter on the keyboard.if (\$programname startswith "snoopy") then { action(type="omfile" fileOwner="root" fileGroup="root" fileCreateMode="0600" file="/var/log/snoopy.log") stop } EOFRestart rsyslog daemon to reread configuration files by running -
sudo systemctl restart rsyslog
5. Install the snoopy package in your EC2 Instance
Run this command to update your instance-
sudo apt updateRun
sudo apt install snoopyto install snoopy logger, after snoopy get installed you will see this screen

- Select yes, to do so, click on the left arrow key on the keyboard and then press enter.
6. Configure Snoopy to log every executed command
To configure snoopy to log every executed command we would have to change the log level of snoopy in its configuration file. Snoopy has various log levels based on which it decides whether to register the command or not in a log file. You can think of log level as the sensitivity of registering logs.
To change the log level, follow these steps-
Run
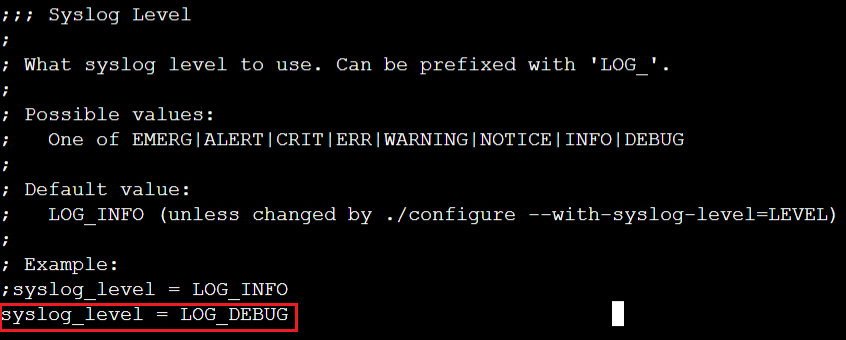
sudo nano /etc/snoopy.inito edit the snoopy configuration file.In the configuration file, get to the bottom of the file. In the last line, you will see this line ;syslog_level = LOG_INFO
Remove the semicolon and after LOG_ write DEBUG in place of INFO
The whole line should look like this syslog_level = LOG_DEBUG
In fact, you can just paste the highlighted line in the above point at the bottom of the configuration file without removing anything. You can either remove the comment by removing the semicolon and changing the log level to DEBUG or just add a new line at the bottom of the line. Semicolon is of importance here, if you decide to change the existing line, remove the semicolon else if you decide to add a new line do not remove the already existing semicolon in the already existing line rather just add the new line below it.
If you decide to change the existing line, the config should look like this

or If you decide to add a new line, the config should look like this.
After this press ctrl+s and ctrl+x on your keyboard and then run sudo reboot after running this command your screen will freeze, and you will need to ssh into your machine again. Wait for a minute and then ssh into your EC2 instance.
7. Test that Snoopy is registering every command
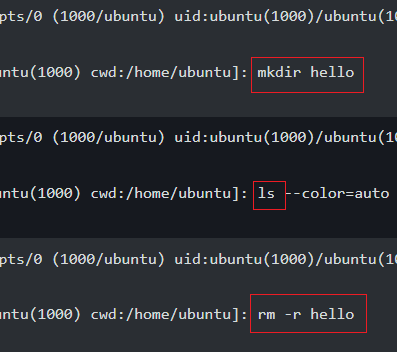
Run various commands like
mkdir newDirectory,ls,rm -r newDirectory, etc.Now you can see these commands in the log file. Display the logs by running
sudo cat /var/log/snoopy.logNow snoopy is registering other logs also, like the authentication logs when you ssh into your EC2 instance so there is going to be a lot of content, you will see the latest commands at the bottom.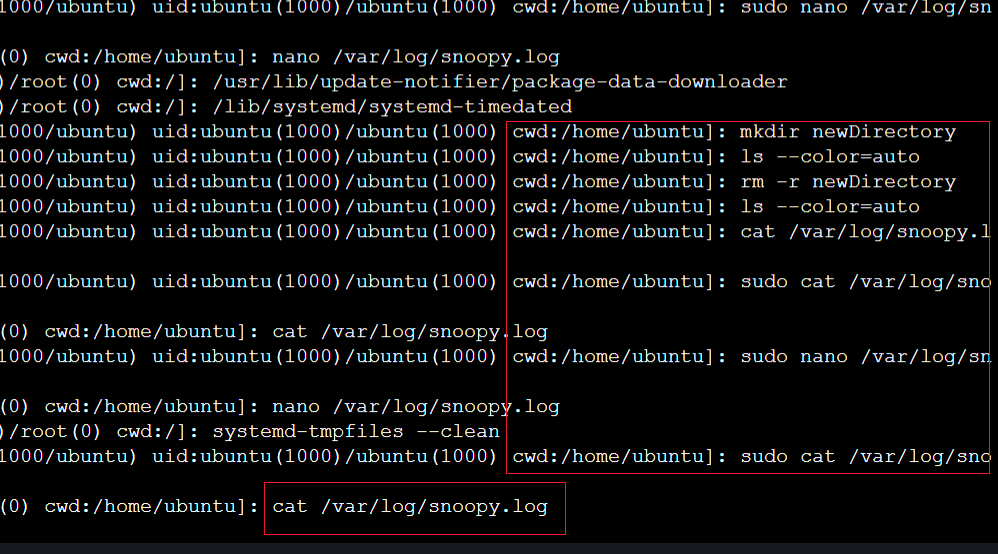
8. Install AWS CloudWtach agent
Run the command below to download the CloudWatch agent
wget https://amazoncloudwatch-agent.s3.amazonaws.com/ubuntu/amd64/latest/amazon-cloudwatch-agent.debRun the command below to install the CloudWatch agent
sudo dpkg -i -E ./amazon-cloudwatch-agent.deb
9. Create and save the CloudWatch agent configuration file
Run the command below, it will create CloudWatch agent configuration file in /opt/aws/amazon-cloudwatch-agent/etc directory, and open the file in the nano editor.
sudo nano /opt/aws/amazon-cloudwatch-agent/etc/amazon-cloudwatch-agent.jsonPaste the code below
              {
                  "agent": {
                          "run_as_user": "root",
                          "region": "ap-south-1",
                          "metrics_collection_interval": 10
                  },
                  "logs": {
                          "logs_collected": {
                                  "files": {
                                          "collect_list": [
                                                  {
                                                          "file_path": "/var/log/snoopy.log",
                                                          "log_group_name": "CloudWatch-Agent-Log-Group",
                                                          "log_stream_name": "{instance_id}-user_command_stream",
                                                          "timezone": "Local"

                                                  },
                                                  {
                                                          "file_path": "/var/log/syslog",
                                                          "log_group_name": "CloudWatch-Agent-Log-Group",
                                                          "log_stream_name": "{instance_id}-syslog_stream",
                                                          "timezone": "Local"

                                                  },
                                                  {
                                                          "file_path": "/var/log/auth.log",
                                                          "log_group_name": "CloudWatch-Agent-Log-Group",
                                                          "log_stream_name": "{instance_id}-auth.log_stream",
                                                          "timezone": "Local"

                                                  }
                                          ]
                                  }
                          }
                  }
              }
press ctrl+s and ctrl+x on your keyboard
Now, just make sure you have changed the region to the region in which your EC2 instance is located, in the above json code.
If you want to know more about how to write a custom json configuration file for the CloudWatch agent, go to the AWS CloudWatch documentation by clicking here
Now run the command below to start the AWS CloudWatch agent
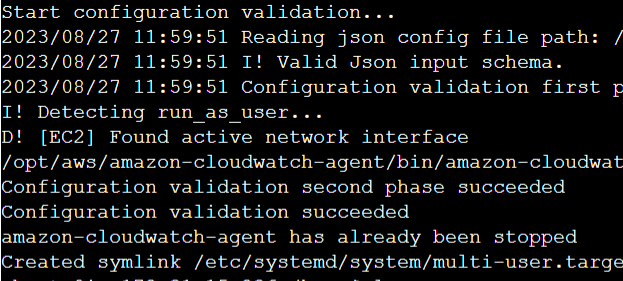
sudo /opt/aws/amazon-cloudwatch-agent/bin/amazon-cloudwatch-agent-ctl -a fetch-config -m ec2 -s -c file:/opt/aws/amazon-cloudwatch-agent/etc/amazon-cloudwatch-agent.jsonYou will see the screenshot below after running the above command.
It's good to restart your machine by running
sudo apt rebootyour screen will freeze and you will need to ssh into your machine again.
10. See your entered commands in the CloudWatch log group
Go to the AWS CloudWatch service and in the log group that we have created in step 2.
You will see three log streams there, go to the stream with the name user_command_stream
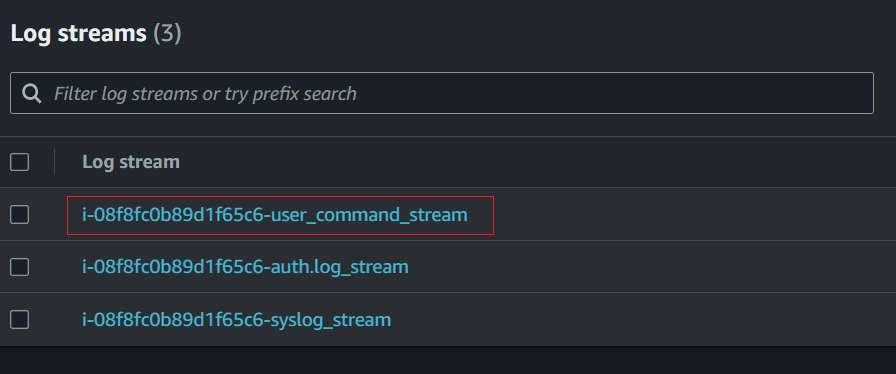
In this log stream, you will see the latest entered commands at the bottom of the stream. Just make sure you have clicked on resume in the Auto retrying option.

Below are the commands which have been entered into my EC2 instance
Congratulations 🎉🎊 You are now seeing the commands entered in your instance in cloudwatch.
If you have any question regarding the project or you are facing any problem feel free to ask me in comments.
**If you like the blog please do follow and like the blog.**😁
Thank You for following along.
-- Anshul Singh


